2013年9月30日 星期一

Xcode5 IOS7 SDK 不使用 ARC 與 Storyboards

Xcode 5 without ARC and Storyboards

在 Xcode5 的 ios 開發中

Apple 拿掉了 Use Stroyboards 與 Use Automatic Reference Counting 的選項

對於不習慣使用 Storyboard 與 Arc 的人造成一定的困擾(我自己...)

這邊介紹怎麼在 Xcode5 下不使用 Storyboards 與 Arc 來開發

一樣開啟 Xcode5 建立一個專案

選擇 Empty Application


建立完成後大該長這個樣


接著先至 Project 的 Build Settings 將 ARC 的使用改為 no


再來就至專案下建立熟悉的 ViewController

習慣使用 xib 開發的記得要將 xib 的選項打勾

因為本人不習慣使用 xib 所以就沒勾了


Creat 後會長這樣


開始寫 code

AppDelegate.h

#import "MainViewController.h"  //import viewcontroller

@interface AppDelegate : UIResponder<UIApplicationDelegate>

@property (strong, nonatomic) UIWindow *window;

@property (retain, nonatomic) MainViewController *viewcontroller_main;  //define viewcontroller

@end

AppDelegate.m 的部分要注意將 ARC 設為 no 之後就可以加上 autorelease 了

AppDelegate.m

-(void)dealloc{
    
    [_viewcontroller_main release];
    
    [super dealloc];
}

- (BOOL)application:(UIApplication *)application didFinishLaunchingWithOptions:(NSDictionary *)launchOptions
{
    self.window = [[[UIWindow alloc] initWithFrame:[[UIScreen mainScreen] bounds]] autorelease];
    
    self.viewcontroller_main = [[MainViewController alloc]initWithNibName:nil bundle:nil];
    
    [self.window setRootViewController:self.viewcontroller_main];
    
    [self.viewcontroller_main release];
    
    [self.window makeKeyAndVisible];
    
    return YES;

}

MainViewController.m 

- (id)initWithNibName:(NSString *)nibNameOrNil bundle:(NSBundle *)nibBundleOrNil
{
    self = [super initWithNibName:nibNameOrNil bundle:nibBundleOrNil];
    if (self) {
        [self.view setBackgroundColor:[UIColor whiteColor]];
    }
    return self;
}

- (void)viewDidLoad
{
    [super viewDidLoad];
// Do any additional setup after loading the view.
    UIAlertView *alertview = [[UIAlertView alloc]initWithTitle:@"hello world" message:nil delegate:nil cancelButtonTitle:@"ok" otherButtonTitles: nil];
    [alertview show];
    [alertview release];
}

最後模擬器下的結果應該會像這樣


2013年9月17日 星期二

IOS QRcode Generator 二維條碼產生器

提供一個簡單的二維條碼產生器

Development environment

Xcode 4.6.3

iOS-QR-Code-Encoder   Update: Nov 28,2012

https://github.com/moqod/iOS-QR-Code-Encoder 


Start:

建立一個 single view project


將下載下來的檔案案解壓縮後

將需要使用到的檔案拉到專案內自己習慣放 Library 的位置

需要用到的有 libqrencode 資料夾內的所有檔案

跟 Classes 內的 QRCodeGenerator.h 和 QRCodeGenerator.m

拉完後大該會像這樣


拉完後記得將 QRCodeGenerator.m 的 Target Membership 打勾


不然在 Compiler 時會出現錯誤

接著就開始 coding

ViewController.m

    
#import "QRCodeGenerator.h"
    
- (void)viewDidLoad
{
    [super viewDidLoad];
   
    //要轉換為 qrcode 的字串
    NSString *str_qrcode = @"https://www.google.com.tw/";

    //定義與初始畫 uiimageview 用來放產生的 qrcode
    UIImageView *imgview_qrcode = [[UIImageView alloc] initWithFrame:CGRectMake(0, 0, 320, 320)];
    
    imgview_qrcode.backgroundColor = [UIColor whiteColor];

    //讓 uiimageview 的 image 為 qrcodegenerator 產生的 qrcode image 
    imgview_qrcode.image = [QRCodeGenerator qrImageForString:str_qrcode imageSize:imgview_qrcode.bounds.size.width];
   
    //將 uiimageview 加入主畫面中
    [self.view addSubview:imgview_qrcode];
    
    [imgview_qrcode release];
    
}
   

就這樣

你可以產生出一個內容為 google 網址的 QRcode


2013年3月24日 星期日

IOS Zxing QRcode 教學

使用 Xzing Library 寫一個簡單的 QRcode 掃瞄器

先至 Xzing 下載最新版的 Library

https://code.google.com/p/zxing/

寫本篇文章時 

Xcode Version : 4.6.1

Zxing Version : 2.1

先建立一個Single View Application Project


本專案只實作iPhone Device


專案建立完成後將下載下來的 Zxing-2.1 解壓縮後找到裡面的 iphone 跟 cpp 資料夾


複製到剛剛建的專案目錄下


接著將專案目錄下的 iphone/ZXingWidget/ZXingWidget.xcodeproj


拖拉至剛剛建的 Project 專案下面


接著是專案內 Build 的設定

點選 ZXingWidget.xcodeproj 至 TARGETS Build Settings 下的 Other Warning Flags

加入一條 -Wno-unused-private-field 

(解決錯誤訊息 private field 'cached_y_' is not used ...等的問題)


點選專案至 Targets Build Settings 下的 Header Search Paths

加入 iphone/ZXingWidget/Classes     recursive

跟 cpp/core/src    non-recursive


至 Targets Build Settings 下的 C++ Standard Library 改為 Compiler Default

(解決錯誤訊息 apple mach o linker error ...等的問題)


至 Targets Build Phases 下加入一個 Target Dependencies

ZxingWidget (ZxingWidget)

至 Targets Build Phases 下加入六個 Link Binary Libraries

libZxingWidget.a
AudioToolbox.framework
AVFoundation.framework
CoreMedia.framework
CoreVideo.framework
libiconv.dylib


最後將 ViewController.m 檔名改為 ViewController.mm

(解決錯誤訊息 iostream file not found ...等的問題)


最後為 ViewController.h 跟 ViewController.mm 內的 Code

ViewController.h
#import <UIKit/UIKit.h>
#import "ZXingWidgetController.h"
@interface ViewController : UIViewController<zxingdelegate>
    -(IBAction)scanButton:(id)sender;
@end

ViewController.mm
#import "ViewController.h"

#ifndef ZXQR
#define ZXQR 1
#endif

#if ZXQR
#import "QRCodeReader.h"
#endif

#ifndef ZXAZ
#define ZXAZ 0
#endif

#if ZXAZ
#import "AztecReader.h"
#endif

@interface ViewController ()

@end

@implementation ViewController

- (void)viewDidLoad
{
    [super viewDidLoad];
 // Do any additional setup after loading the view, typically from a nib.
    UIButton *scan_button = [UIButton buttonWithType:UIButtonTypeRoundedRect];
    [scan_button setFrame:CGRectMake(0, 0, 320, 50)];
    [scan_button setTitle:@"scan" forState:UIControlStateNormal];
    [scan_button addTarget:self action:@selector(scanButton:) forControlEvents:UIControlEventTouchUpInside];
    [self.view addSubview:scan_button];
}

-(IBAction)scanButton:(id)sender{
    ZXingWidgetController *widController = [[ZXingWidgetController alloc] initWithDelegate:self showCancel:YES OneDMode:NO];
    
    NSMutableSet *readers = [[NSMutableSet alloc ] init];
    
#if ZXQR
    QRCodeReader* qrcodeReader = [[QRCodeReader alloc] init];
    [readers addObject:qrcodeReader];
    [qrcodeReader release];
#endif
    
#if ZXAZ
    AztecReader *aztecReader = [[AztecReader alloc] init];
    [readers addObject:aztecReader];
    [aztecReader release];
#endif
    
    
    widController.readers = readers;
    [readers release];
    
    [self presentModalViewController:widController animated:YES];
    [widController release];
}

#pragma mark -
#pragma mark ZXingDelegateMethods

- (void)zxingController:(ZXingWidgetController*)controller didScanResult:(NSString *)result {
    [self dismissModalViewControllerAnimated:NO];
    NSLog(@"%@",result);
}

- (void)zxingControllerDidCancel:(ZXingWidgetController*)controller {
    [self dismissModalViewControllerAnimated:YES];
}

- (void)didReceiveMemoryWarning
{
    [super didReceiveMemoryWarning];
    // Dispose of any resources that can be recreated.
}

@end

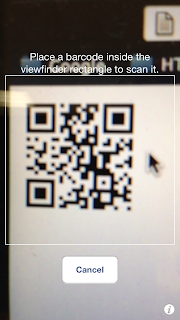
在設備上的結果


按下 Button 後會開啟掃描畫面


掃描 QRcode 後會執行 NSLog(@"%@",result);

沒意外的話 All Output 會將結果顯示出來


END.

2013年2月26日 星期二

Facebook OAuth use Javascript API


一些 Facebook Javascript API 簡單與常用的功能

開發前需先至 Facebook Develope 申請並取得APP ID

並參考本頁面 Login without Javascript SDK 架設基本環境


    //facebook api 初始化設定
    window.fbAsyncInit = function () {
        FB.init({
            appId: 'your facebook app ip', //facebook app id
            channelUrl: ' localhots/channel.html', // Channel.html 位置
            status: true, // check login status
            cookie: true, // enable cookies to allow the server to access the session
            xfbml: true  // parse XFBML
        });
    };

    //載入 facebook jssdk
    (function (d) {
        var js, id = 'facebook-jssdk', ref = d.getElementsByTagName('script')[0];
        if (d.getElementById(id)) { return; }
        js = d.createElement('script'); js.id = id; js.async = true;
        js.src = "//connect.facebook.net/en_US/all.js";
        ref.parentNode.insertBefore(js, ref);
    } (document));

    //facebook javascript 登入
    function login() {
        FB.login(function (response) {
            if (response.authResponse) {
                FB.api('/me', 'GET', function (response) {
                    console.log(response.name);    //取得使用者名稱
                    consoel.log(response.email);    //取得使用者 Email 
                    console.log(response.id);    //取得使用者 facebook id
                });
            } else {
                alert('登入失敗');
            }
        }, { scope: "email,user_groups,publish_stream,publish_checkins" });
        //scope為要求取得使用者的 permission 
        //EX: email:取得使用者 Email
        //    user_groups: 使用者社團資料
        //    user_about_me: 使用者關於我
        //    user_photos: 使用者相片
        //    publish_stream: 使用者發文權限
        //more: http://developers.facebook.com/docs/reference/login/#permissions
    }

    //使用者登出
    function logout() {
        FB.logout(function (response) {
            // user is now logged out
        });
    }

    //取得目前登入狀態
    function getLoginStatus() {
        FB.getLoginStatus(function (response) {
            console.log('logout');
            console.log(response);
        });
    }

    //取得使用者資料
    function getUserData() {

        //使用者資料        
        FB.api('/me','GET', function (response) {
            console.log('me:');
            console.log(response);
            console.log('Hello ' + response.name);
        });

        //使用者縮圖
        FB.api('/me/picture', 'GET', function (response) {
            if (response) {
                console.log('picture:');
                console.log(response);
            } else {
                alert("Error");
            }
        })

        //有使用者在內的照片
        FB.api('/me/photos', 'GET', function (response) {
            if (response) {
                console.log('photos:');
                console.log(response);
            } else {
                alert("Error");
            }
        })

        //使用者好友資料
        FB.api('/me/friends','GET',function (response) {
            if (response) {
                console.log('friends:');
                console.log(response);
            } else {
                alert("Error");
            }
        });

        //社團資料 (需開啟 user_groups permission)
        FB.api('/me/groups', 'GET', function (response) {
            if (response) {
                console.log('groups:');
                console.log(response);
            } else {
                alert("Error");
            }
        });     
    }

    //使用者發文(需開啟 publish_stream permission)
    function publish(){
        FB.api('/me/feed', 'post', { message: 'facebook api' }, function (response) { 
            //{message:'發文內容'}
            if (!response || response.error) {
                alert('Error');
            } else {
                alert('Post ID: ' + response.id);
            }
        });
    }

    //使用者打卡(需開啟 publish_checkins permission)
    function Checkins() {
        var data = {    
            "place" : "117464364938130",    //打卡位置ID
            "coordinates" : JSON.stringify({    //打卡位置至經緯度
                'latitude' : 40.7798027,
                'longitude' : -73.9481371,
            })
        };
        FB.api('me/checkins',data,'POST', function (response) {
            if (response) {
                console.log('checkins success');
                console.log(response);    
            } else {
                alert('Error');
            }
        })
    }

2013年1月24日 星期四

Javascript XML(DOM) & JSON 解析


//JSON 解析

var json = '{"a":1,"b":2,"c":3}';

var job = JSON.Parse(json);    //字串轉物件

console.log(job.a);    //1

var jobtostring = JSON.stringify(job);    //物件轉字串

console.log(jobtostring);    //"{"a":1,"b":2,"c":3}"


//XML(DOM)解析 

var xml = ' +
11 +
22 +
33 +
44 +
55 +
66 +
';

var xmlparse = new  DOMParser();    //宣告解析XML物件

var xmlobj = xmlparse.parseFromString(xml,'text/xml');    //字串轉物件

console.log(xmlobj);    //DOM object

console.log(xmlobj.getElementsByTagName('a')[0]);    //DOM object

console.log(xmlobj.getElementsByTagName('Company')[0].childNodes[0].childNodes[0].nodeValue);    //1

var serializer = new XMLSerializer();    //宣告XML序列化物件

console.log(serializer.serializeToString(xmlobj));    //物件轉字串